:spinbounce: Update:


We have now officially launched Sticky Bars natively within the Unbounce Builder! Click here to start using Sticky Bars on all your Unbounce landing pages! 🙂


Have you seen the 2015 Unbounce CTAConf page?? What a beauty!


Here in Customer Success, we decided to dig into that page a bit and show YOU how to recreate its sticky navigation header on your desktop page using two Tips & Scripts. This header will allow your visitors to blissfully jump from one page section to another, all while keeping the CTA button ready and waiting for that all precious ‘click’. 


How to Install in Unbounce


Click Here for Instructions


🚨

This is not an official Unbounce feature. This functionality is based entirely on third party code, and has only been tested in limited applications. Since this isn’t a supported Unbounce feature, our support team will be unable to assist if things go awry. So if you are not comfortable with HTML, Javascript and CSS, please consider consulting an experienced developer.


Instructions


Scripts Needed


Grab the two javascripts required for this setup here:


Step 1.


Build your header box. Add a box to your Unbounce page that spans across the entire width of your page section. You can completely customize the format of the header however you want.


Step 2.


Build your buttons. Drag a button element onto your page from the left-hand menu. On my page, I turned the button colour transparency down to zero and removed the button’s border so that just the text remains visible. Once you create the first button, you can just copy and paste it to create the additional buttons using our copy & paste tool.


Step 3.


Size and place the buttons inside your sticky header box.


Step 4.


Creating your button anchors. You can use any element in an Unbounce page as a button destination/anchor. You just take the box/text/page section’s Element Metadata ID and use it as your Button’s ‘Go To URL’ destination. Check out my screenshot of where these IDs can be found here.


Step 5.


For my button anchors, I will typically use a transparent box. They’re very easy to add and format. Drag a box onto your page, then turn it’s opacity completely down and remove its border. You’ll want to place these boxes to the spots on your page that your navigation bar is going to scroll down to and make sure you consider the length of your header when you place this box. When you place the box, make sure to grab it’s Element Metadata ID and then put it in your button’s destination URL field.  


Step 6.


Add the two Javascripts. Once all of your navigation buttons are linked to the corresponding transparent box anchors on your page, all that’s left to do is adding the two scripts to your page for sticky header and smooth scrolling. Check out our documentation on how to add Javascript to an Unbounce page here..


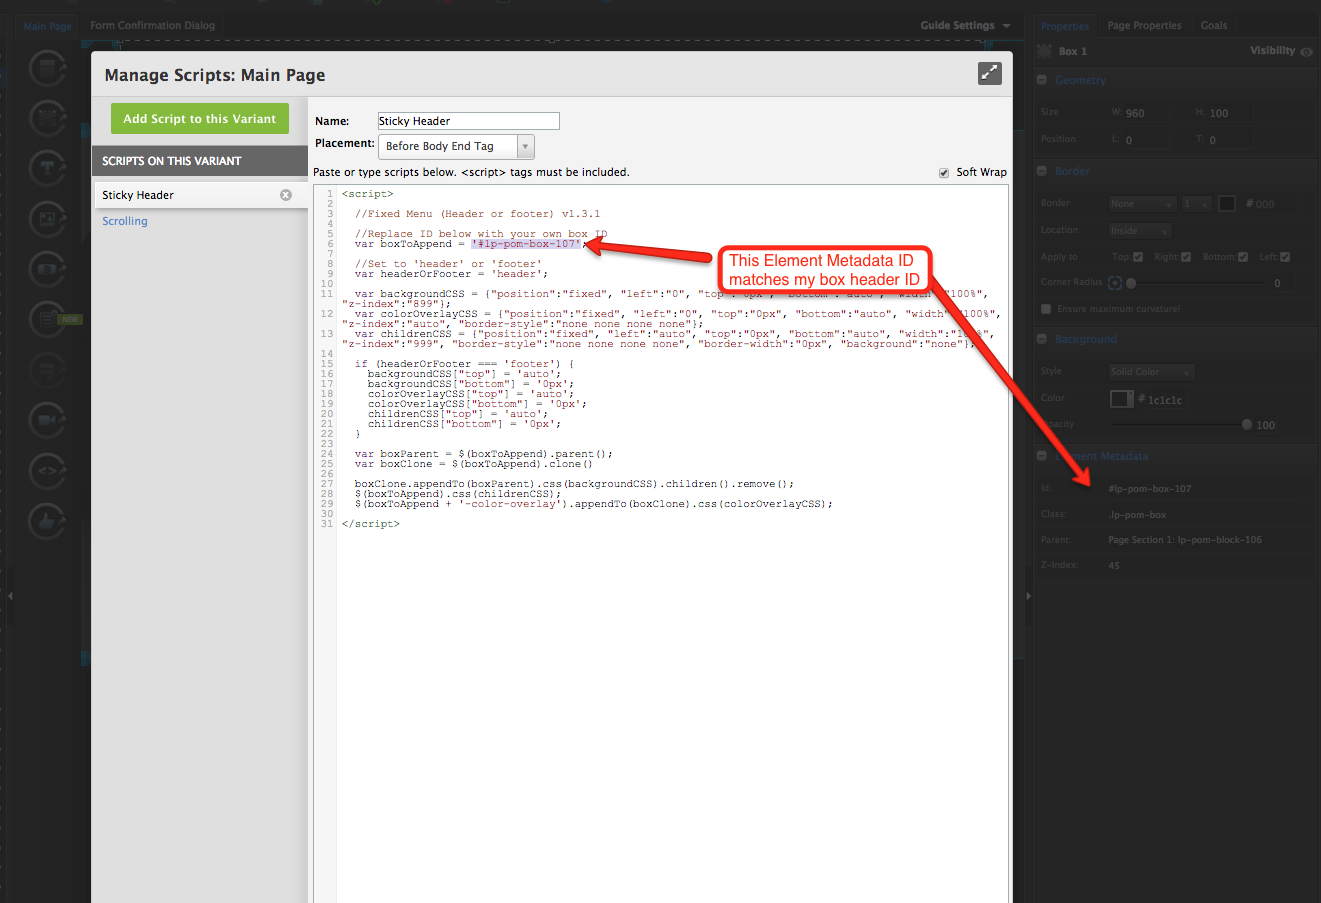
You can take the Javascripts mentioned at the beginning of this post and paste them right into your javascript editor on the page. You will need to grab the Element Metadata ID of your header box and put it into the Sticky Header javascript, check out where that needs to be done here.


Step 7.


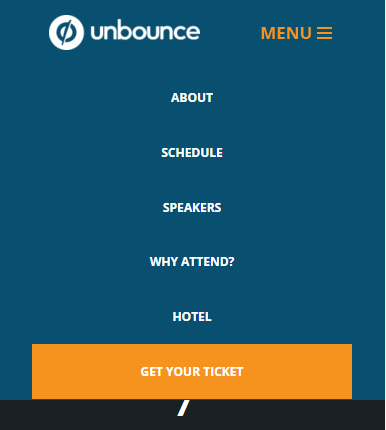
As mentioned in the title, this workaround is a desktop only feature. You will probably want to go to your mobile view and either compact the menu to make it fit on mobile, or hide its visibility completely. To see how our visibility tool works, you can check out our documentation here.


Testing


Like anything else you implement on your page, you’re going to want to test this out thoroughly to see what effect (if any) it has on your conversion rates. We recommend running an A/B test and segmenting a small portion of traffic towards the page - just to be safe.


Conclusion


This is a really slick way to have your customers navigate the different aspects of your landing page while still keeping your CTA on screen and ready to be clicked. 🙂


Can’t see the instructions? Log in or Join the Community to get access immediately. 🚀


Want to take your Unbounce landing pages + Convertables™️ to the next level?

:spinbounce: Check out the Ultimate List of Unbounce Tips, Scripts & Hacks

Thank you for sharing this. Sticky headers can be great. Can you share the code that you used to do this:


Is it strictly CSS? For a single page site this absolutely the way to go. 


Awesome tutorial, Joel! Super easy to follow and a great use case for a longer format LP such as for a conference.  


Hey Joe. 


I’m glad to hear you like the post.


A mobile ‘Hamburger’ menu was actually going to be our ‘Part 2’ of this post. We’re still working on the tutorial, but we should have something up shortly. 


I’ll make sure to link it here when we get it completed : ) 


Thanks again for checking this out Joe!


Best, 


Joel,


Thank you. I use sticky headers with a CTA button in them now. It works very well, especially at mobile. People can jump right back up to the form when they are ready regardless of where they are on the page. But, with a mobile ‘Hamburger’ menu so much more could be done…


I’ll stay tuned for part 2!


Well done Joel!  You just gave everyone a $5/mo gift as an alternative to using hello bar 🙂


Hey Joe!


I just wanted to let you know that we’ve posted the hamburger menu workaround : ) You can check that out here.


Give it a look Joe and feel free to reach out with any questions.


Joel, I saw the email yesterday… Can’t wait to play with it!


Here’s the link to the Mobile Hamburger Menu: 

/topics/unbounce-tips-scripts-mobile-hamburger-navigation-men…


Hi I have followed your instructions to a tee and all i get is a white sticky scrolling box. None of my buttons that i placed inside on top are showing. please help


Hey Steven,


Thanks for reaching out! I’ve opened up a support ticket so we can take a look at your page and see exactly what’s going on. Look out for an email from me shortly : ) 


This is great. Thanks so much for the well detailed tutorial! 


I have a similar problem… could you share the solution please?


Hey Diana. 


I just sent you a response over the support ticket your fired in this morning. Feel free to get back to me over email at any time : ) 


Joel, I never thanked you for this!


second that - THANK YOU


Excuse me, my header box can’t move as the the effect shown above.  


http://unbouncepages.com/mjclinic-serviceflow/


Can u help me? thank you, i love this effect!


Excuse me, my header box can’t move as the the effect shown above.  


http://unbouncepages.com/mjclinic-serviceflow/


Can u help me? thank you, i love this effect!


Hey Elvis,


Thanks for reaching out!


I’m going to open up a support ticket to help you get this working. Look out for a response from us shortly : ) 


Best, 


Hi Guys


I’ve implemented a sticky footer button and all is working swimmingly (we are using a lead generation model).  The only issue is that we are getting repeated requests from the same user for the download, and I was wondering if this was due to the sticky button?  Our other pages do not feature a sticky button and it is rare that a user asks for the download several times.  Does anyone else have this issue?  If so, did you solve it?  Any help would be appreciated.  The url is here: http://ride.sportactive.net/summer-cycling-october/ 

Many thanks!


Hi Guys

I had a similar problem.  Make sure you put a box inside the footer/header, and that the box and not the footer space is specified in the code. This is the mistake I made.  My page works fine now

Thanks


Hi Guys

I had a similar problem.  Make sure you put a box inside the footer/header, and that the box and not the footer space is specified in the code. This is the mistake I made.  My page works fine now

Thanks


Hi Joel, I’m experiencing the same issueÑelements in header not showing up after implementing the Javascript. Please help! Thanks very much.


Hey Adam,


I can help you get this figured out. Look out for an email from me shortly and we’ll dig into your page : ) 


I had this same issue, it’s because the buttons and content weren’t properly nested in the box. Might be worth looking into for future reference. 


Hello to my favorite marketing tool! 


I’m following this tutorial and had a quick question for you: /topics/unbounce-tips-scripts-sticky-navigation-bar-for-desktop-the-code-behind-our-call-to-action-page?topic-reply-list%5Bsettings%5D%5Bfilter_by%5D=all&topic-reply-list%5Bsettings%5D%5Bpage%5D=1#reply_17723882


Is there a way to have the fix box change backgrounds after the first or second section? Maybe a combo of this tutorial and the “Fading Header” tutorial here: /topics/unbounce-tips-scripts-fading-fixed-header-joyvhnt3qi2…


My CSS skills could use some sharpening. 


----- Screens of my problem. I want the menu bar to be transparent initially, then become solid after passing the main hero so the user can still see the menu:


https://www.dropbox.com/s/ss6txchyf5nj1d4/2016-08-01_1926–Change_the_background_of_a_sticky_header.swf?dl=0


Thanks so much!


Reply