If you don’t currently have an ecomm store, Stripe is a good option for collecting payments as well as test the market for your products. Now you can build your own Stripe checkout right into your Unbounce landing pages to make it easier to turn more browsers into buyers.


See it in action! 💥 Here’s a landing page (built in Unbounce) using a built-in Stripe checkout.


Below we’ve broken down the instructions into two sections (with video) to make it as easy as possible.


🚨

This is not an official Unbounce feature. This functionality is based entirely on third party code, and has only been tested in limited applications. Since this isn’t a supported Unbounce feature, our support team will be unable to assist if things go awry. So if you are not comfortable with HTML, Javascript and CSS, please consider consulting an experienced developer.


Step 1. Enable checkout and create SKU in Stripe


  1. Go to “Settings”

  2. Go to “Checkout Settings”

  3. Make sure you toggle “Enabled” on the top right corner of your screen

  4. Enter the domain you want to use for your checkout (your landing page domain)

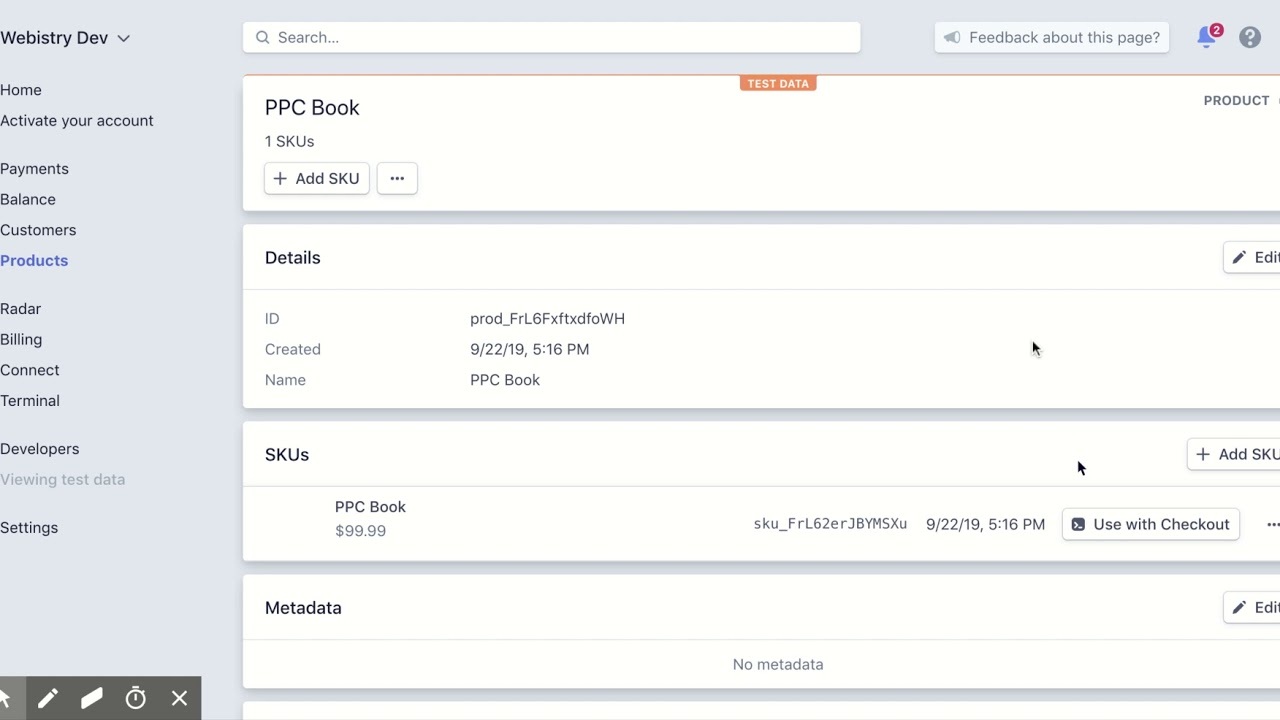
  5. Go to “Create your first product”

  6. Click “Add a test product”

  7. Select whether it’s a one-time purchase or recurring product

  8. Enter product name, currency, and upload image

  9. Click “Done”

  10. Click “Use with Checkout”

  11. Enter your “Success URL”; this is where you will send users after they purchase and were you can setup your purchase tracking (make sure this URL is also whitelisted on step 4)

  12. Enter your “Cancel URL”

  13. Copy the embed code and click Done


Step 2. Paste embed code in your Unbounce landing page (style as needed)


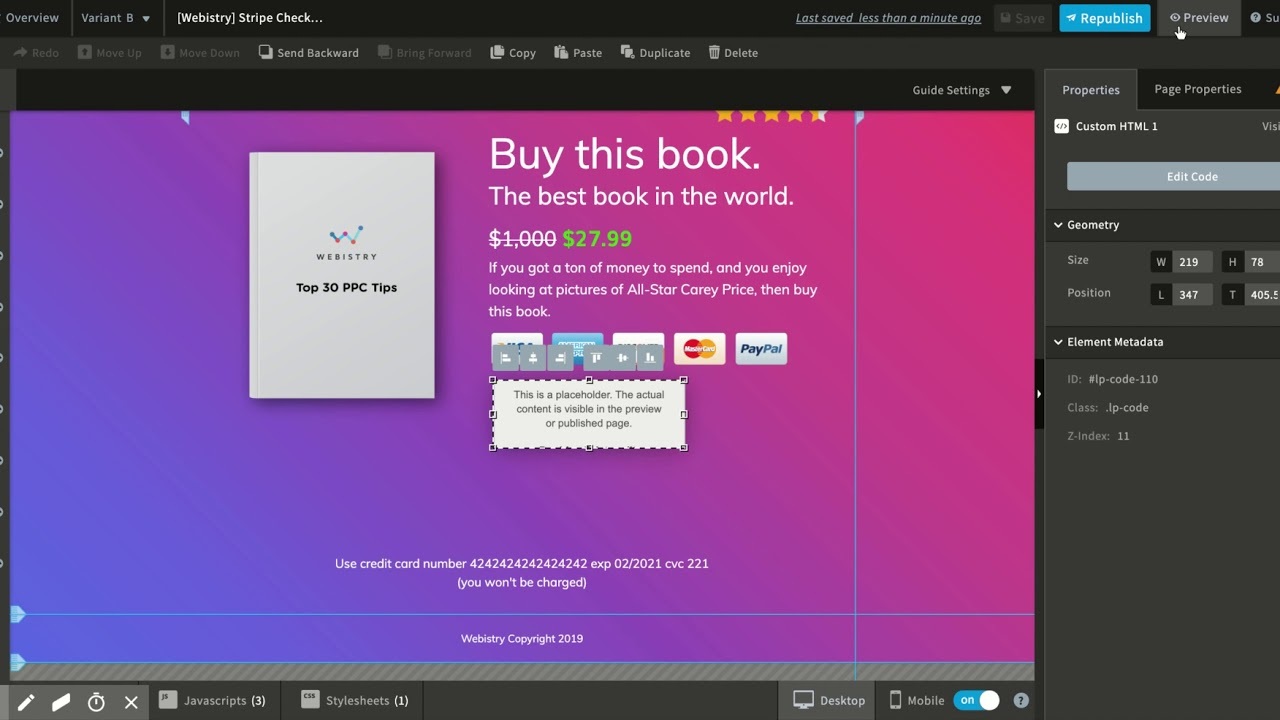
  1. Drag and drop Custom HTML widget

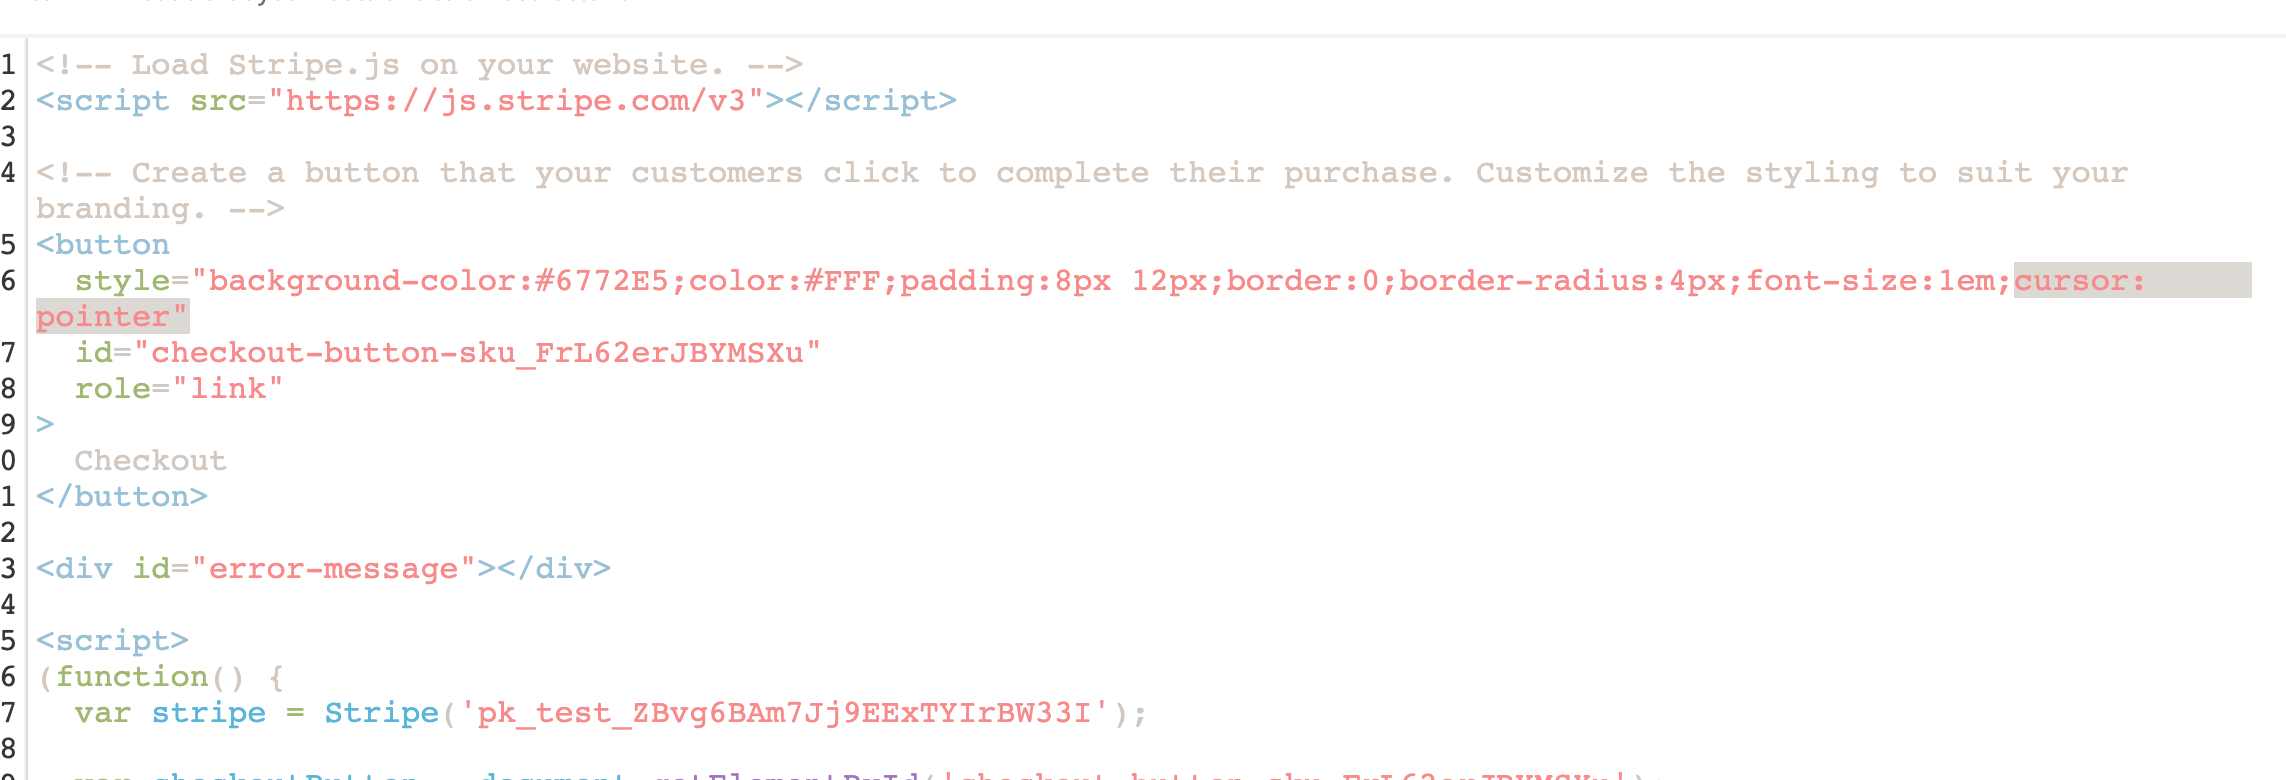
  2. Paste embed code and click Save

  3. Position your placeholder

  4. Click Save and then Preview to make sure your CTA Button is positioned where you want it

  5. Style CTA Button with CSS


That’s it! You’re done!


Let us know if you have any questions about these instructions in the comments section below 👇


Want to take your Unbounce landing pages + popups to the next level?

:spinbounce: Check out the Ultimate List of Unbounce Tips, Scripts & Hacks

🔥 Awesome, Jonathan!!


🙌


🥳


Thank you @Jonathan for this tutorial!


However, after entering the code from Stripe, when I click on the Checkout button, nothing happens.


Is there a way to fix that?


I would also like to know how you manage to add the quantity selection of the product right on the landing page with the delivery address.


Thank you for your help,


Hi Phil! Would you mind sharing the page or giving us access to it? I’d be happy to look into it.


Hi @Jonathan,


I have sent you the access by email.


Thank you,


Hi @phil_dallaire ! I don’t see an email on my end. Did you send the invite to jonathan@webistry.com ?


Hi @Jonathan,

I sent you an another email to your address on Monday. Did you receive it?

Thanks,


Apologies the email was in my spam folder! Replying now.


Hi, @Jonathan I have the same problem as @phil_dallaire did. How were you able to solve it?


Hi there!


I just tested it here, and it seems to be functioning as expected.


Would you be able to share your URL? Feel free to share it privately 🙂


Was anybody able to figure out this issue? I have the same problem - nothing happens when you click the button. https://get.visualspanish.co/cart/


@Stefano @kvladys @Jonathan @phil_dallaire


Hi David!


Our dev team is investigating now - your URL seems to be throwing a ton of errors.


Hoping to have some details shortly.


Ok, thanks!


@David_Garrett @Stefano

The problem was in the preview mode. I guess the reason is that in preview mode the page is http. And in order to transfer to stripe checkout the page has to be https. When I published my landing page with https, the stripe linked worked.


However, i have another question. How to make the button mouse hover? Thanks in advance.


Thanks! That’s not my issue - I am having the same problem but with the secure https:


https://get.visualspanish.co/cart/


Add this to your HTML --> cursor: pointer


😃


@Stefano Thanks a lot for your help!


Hi David, we are seeing this error in console:


v3:1 Uncaught (in promise) IntegrationError: The provided success URL domain (visualspanish.co) is not enabled in the dashboard. Add this domain at https://dashboard.stripe.com/account/checkout/settings.


Got it - thanks!


Hello - Can you help me troubleshoot my checkout button on this page? https://try.wonderschool.com/next-steps/


Hello!


Did you do step no.4?


“Enter the domain you want to use for your checkout (your landing page domain).”


This often gets missed.


Yes, I did!


If you can DM me screenshots of your HTML block and stripe setup I could help 🙂


Ok, just shot you a DM!


Reply