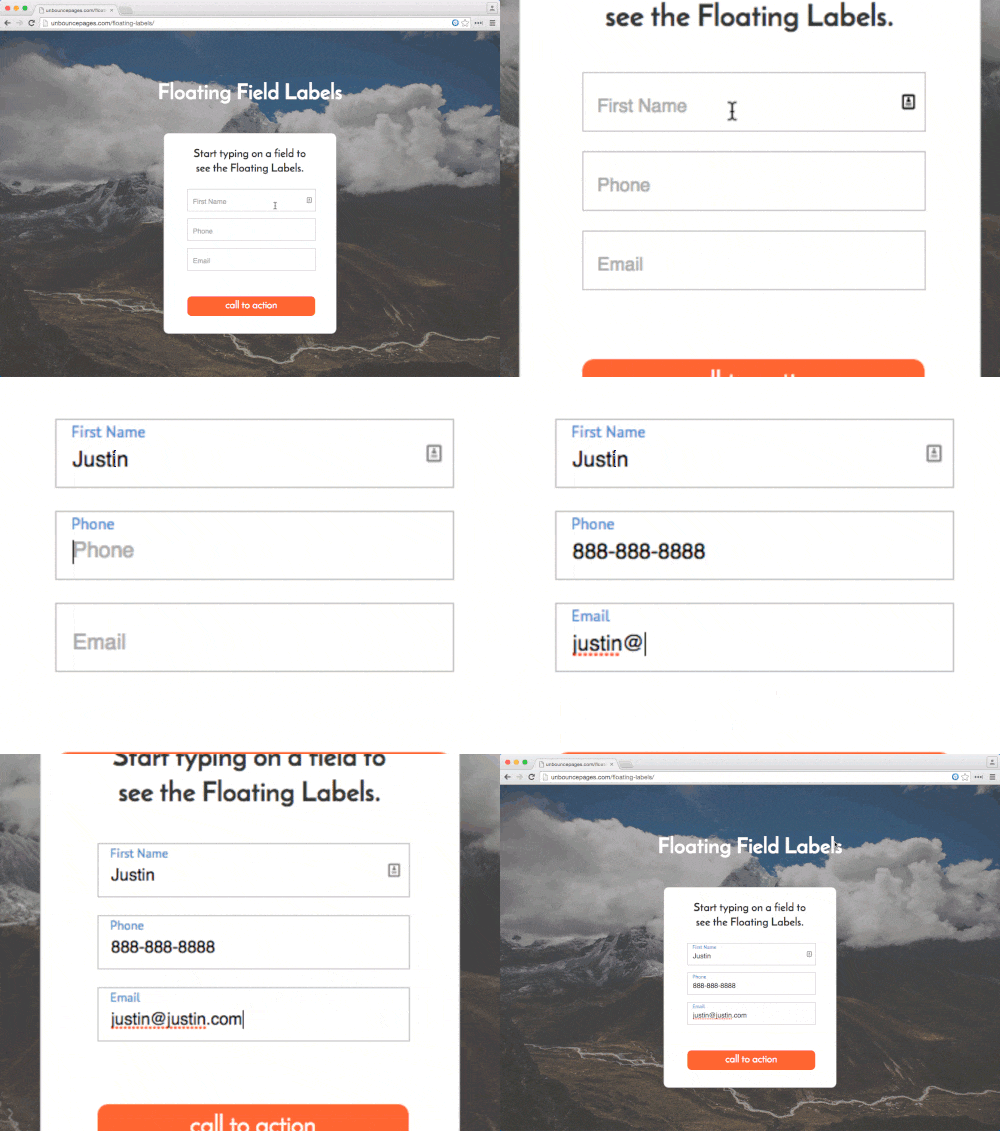
Inline labels (labels that are displayed inside the actual form field) are great for a number of reasons, particularly because they save space and create a much cleaner design experience, which is a must in the ever-growing world of mobile devices. However there is a downside; they disappear when you start typing, which can result in the loss of context.

This might not be a huge problem when it comes to simple information or you only have one or two fields, like your name or email address, but as soon as you add more fields where different type of data is needed, inline labels become problematic. One way to overcome this problem is with the use of floating labels.
Floating labels refer to inline labels that are reduced in size and moved to the top of the field after the user focuses it and starts typing:

You can see the effect built in Unbounce here:
http://unbouncepages.com/floating-labels/
**************************
_ WARNING: YOU ARE ENTERING DEVELOPER TERRITORY _
Please note: This is not an official Unbounce feature. This functionality is based entirely on third party code, and has only been tested in limited applications. Since this isn’t a supported Unbounce feature, our support team will be unable to assist if things go awry. So if you are not comfortable with HTML, Javascript and CSS, please consider consulting an experienced developer.
**************************
Scripts Needed:
Grab the latest javascript here:
https://gist.github.com/victorzen/465390156b3a94790832
Instructions:
Step 1. Ensure you have inline labels (placeholders) working following the instructions here: http://documentation.unbounce.com/hc/en-us/articles/203799174-Adding-and-Editing-Form-Fields/#content7
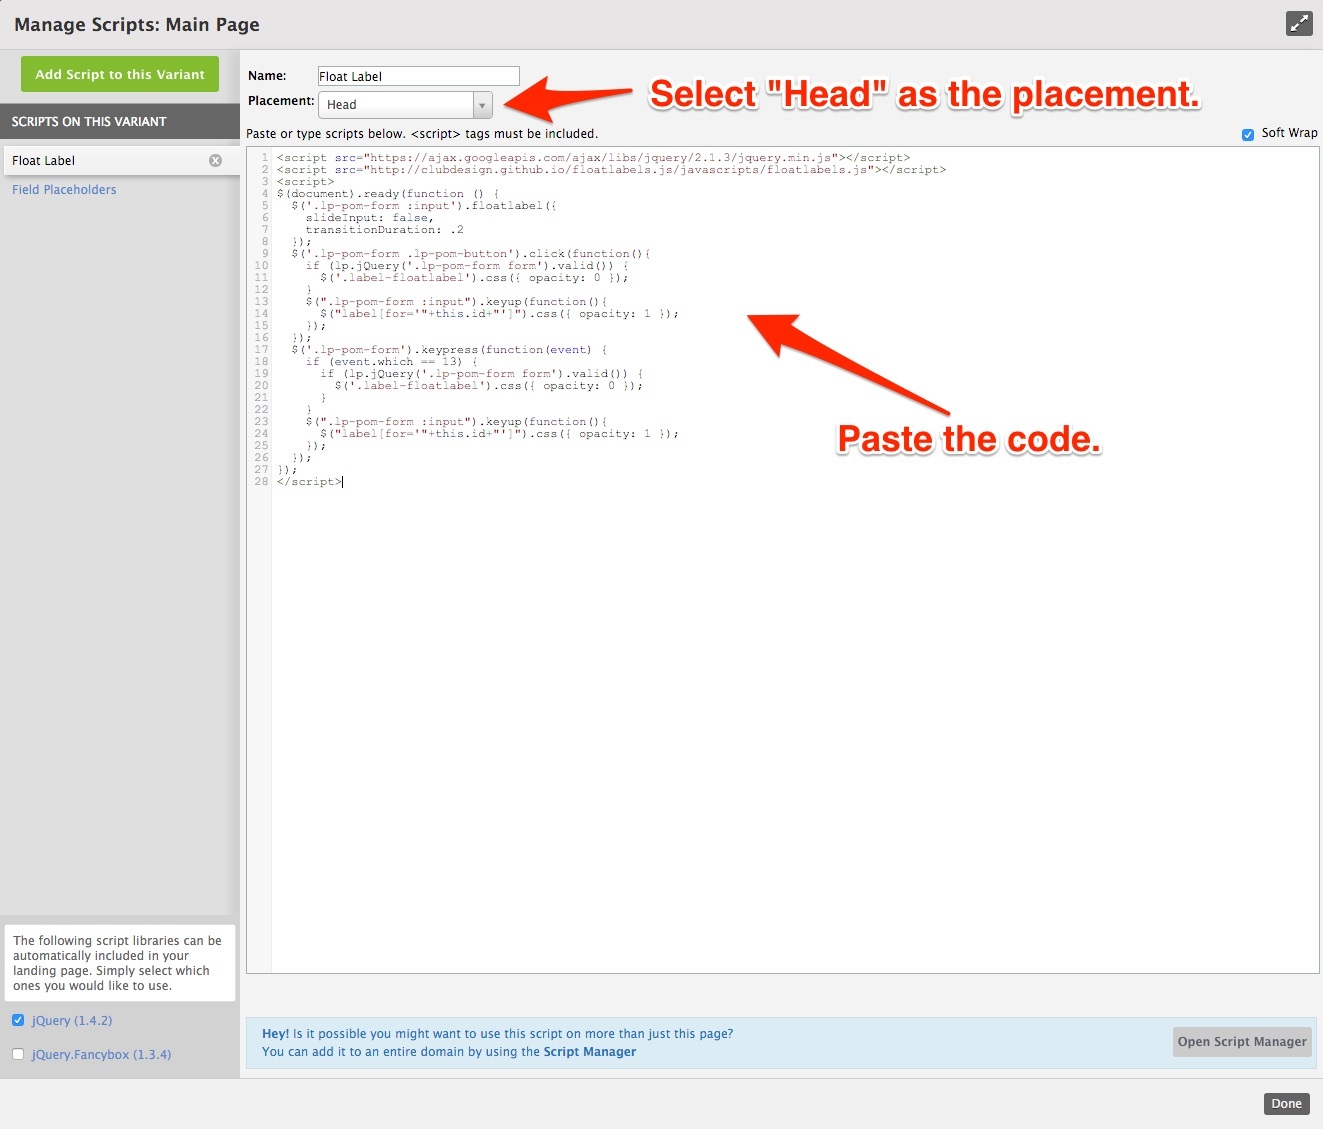
Step 2. Open the Javascript console in the builder and create a new script, with placement set to HEAD.
Step 3. Paste the code which you can find in our GitHub here.
Step 4. Once you’re done, open the Stylesheets section at the bottom of the page builder and paste the CSS code found here.
Step 5. You can change the look of the floating label by editing the type of font, size and color. You can also play around with the placement by changing the value of the ‘top’ property.
Step 6. Save and republish your page to see the effect.
Testing:
Like anything else you implement on your page, you’re going to want to test this out thoroughly to see what effect (if any) it has on your conversion rates. We recommend running an A/B test and segmenting a small portion of traffic towards the page - just to be safe.
Conclusion:
If you’d like to know more about the plugin used for this tutorial and all the options available, please visit the creators page here: http://clubdesign.github.io/floatlabels.js/


