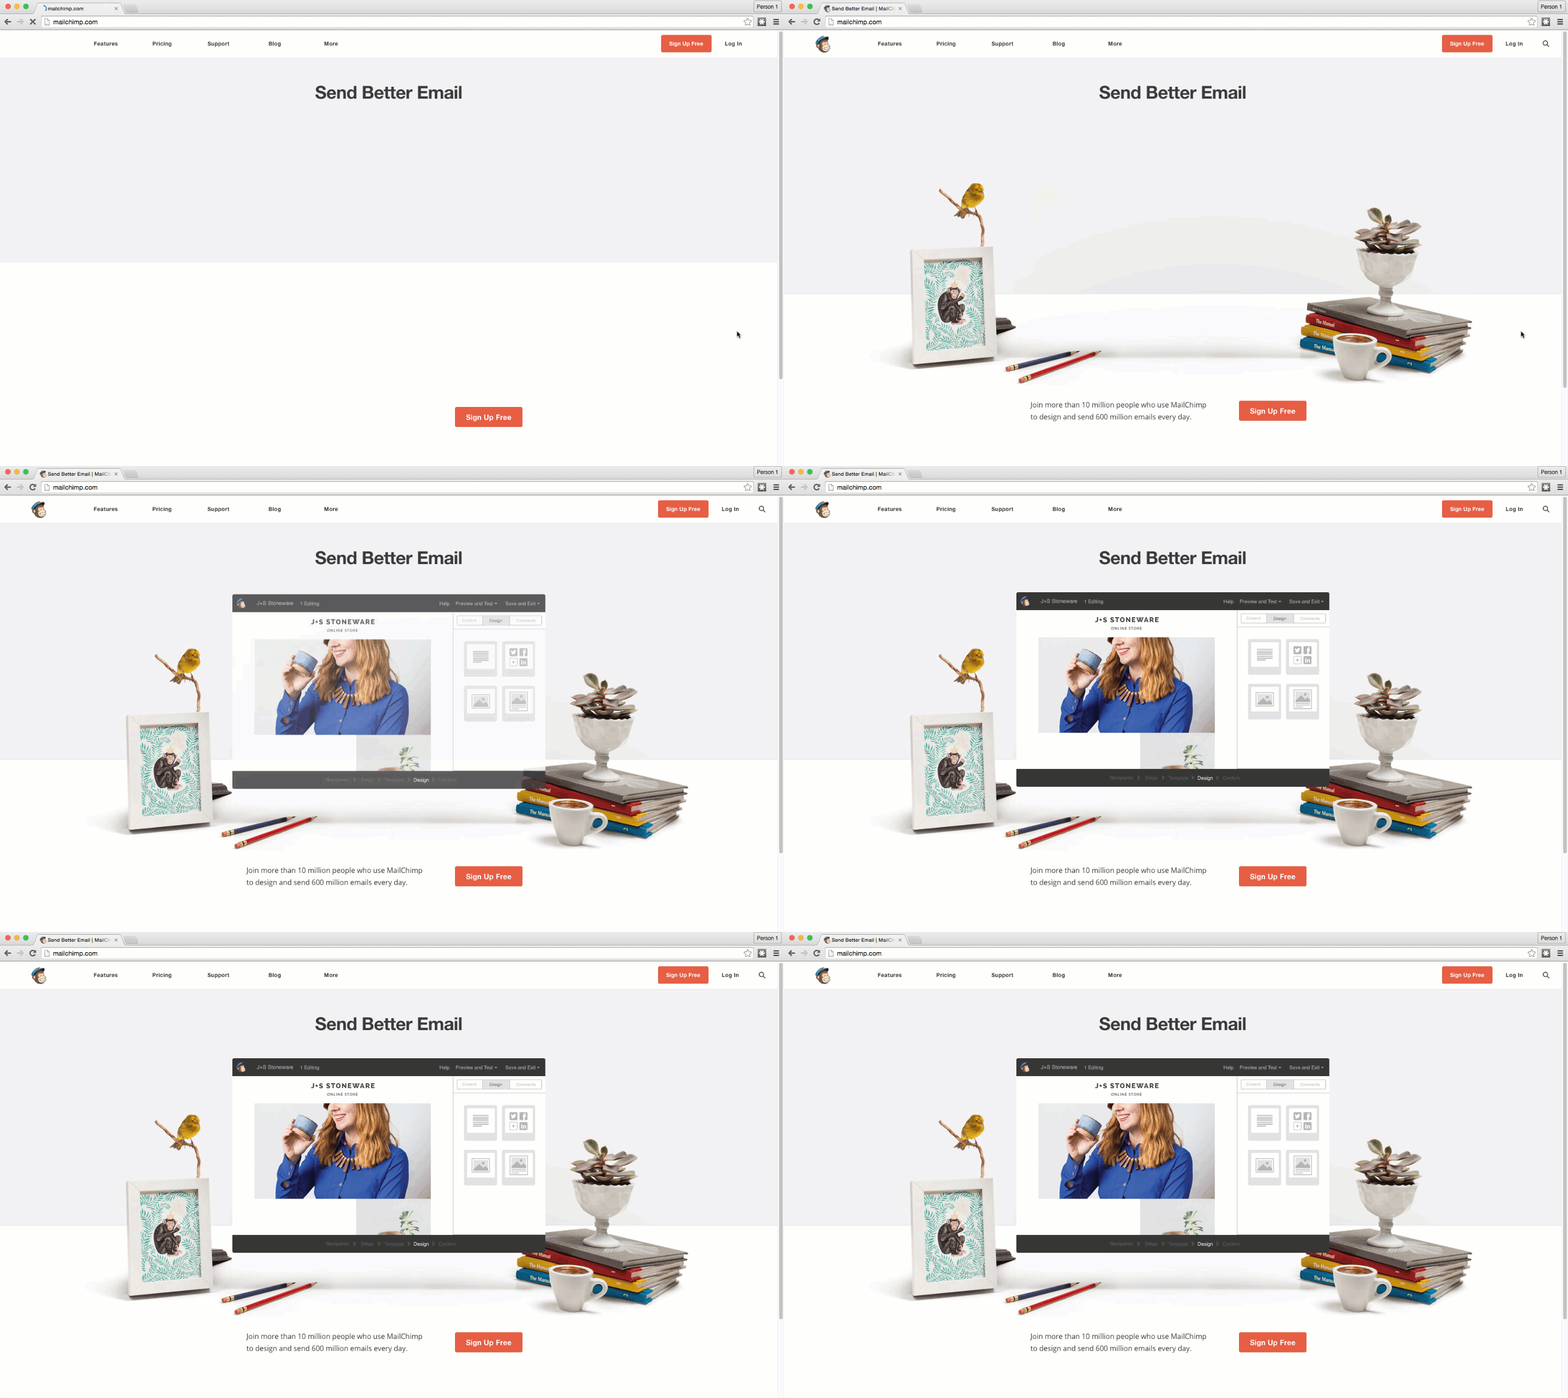
Here’s a script that allows you to apply a quick, smooth animation to any visual asset on your page when the page loads. This is handy if you’re trying to draw subtle attention towards a hero image on your page.
A great example of this can be found when you visit Mailchimp’s website (see below).
The effect uses the animate.css library, which you can read more about here.
This is what the final effect looks like on an Unbounce landing page:
http://landingpage.noahmatsell.ca/animations-1/
**************************
WARNING: YOU ARE ENTERING DEVELOPER TERRITORY
Please note: This is not an official Unbounce feature. This functionality is based entirely on third party code, and has only been tested in limited applications. Since this isn’t a supported Unbounce feature, our support team will be unable to assist if things go awry. So if you are not comfortable with HTML, Javascript and CSS, please consider consulting an experienced developer.
**************************
Scripts Needed:
Grab the latest javascript:
<script src="//ajax.googleapis.com/ajax/libs/jquery/1.4.2/jquery.min.js" type="text/javascript"></script>
<link rel="stylesheet" href="https://cdnjs.cloudflare.com/ajax/libs/animate.css/3.5.1/animate.min.css">
<script>
//The page element that will be animated on page load.
var yourElement = "#lp-pom-image-54";
//The effect that will be applied to your page element. See https://daneden.github.io/animate.css/ for full list.
var yourEffect = "slideInUp";
var effectClass = "animated " + yourEffect;
jQuery( document ).ready(function() {
  jQuery(yourElement).show().addClass(effectClass).one('webkitAnimationEnd mozAnimationEnd MSAnimationEnd oanimationend animationend', function(){
    jQuery(this).removeClass();
  });
});
/**
    * Do not remove this section; it allows our team to troubleshoot and track feature adoption.
    * TS:0002-03-028
*/
</script>
Instructions:
Step 1.
Paste the script into your javascript box and set the placement to ‘Before Body End Tag’
Step 2.
Replace the value of the yourElement variable with the ID of your target page element (found in the righthand Page Properties pane).
Step 3.
Replace the value of the yourEffect variable with your desired effect. See here for a full list of effects.
Step 4.
Hide the animated page element by adding the following CSS to your landing page Stylesheets:
#lp-pom-image-1 { display:none; }
Step 5.
Replace #lp-pom-image-1 with the ID of your target page element.
**************************
Testing:
Like anything else you implement on your page, you’re going to want to test this out thoroughly to see what effect (if any) it has on your conversion rates. We recommend running an A/B test and segmenting a small portion of traffic towards the page - just to be safe.
Conclusion:
This little animation can be used in many different ways. For example, here’s the same effect being used in tandem with a non-looping .GIF. If you find an interesting way to use this, be sure to share a .gif or video in the comments below and show us what you’ve made. Happy animating!


