How To: Add High-Resolution Retina Images to your Landing Page (for use with retina screens such as iPhone, iPad...)

  • 11 September 2015
  • 33 replies
  • 149 views

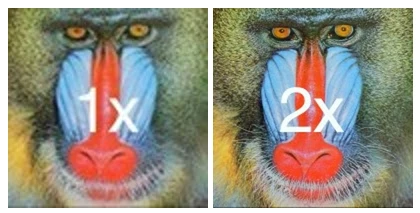
On retina/high-density displays, your images look fuzzy. Compare the 1x image to 2x. Which one would you rather your visitors see?

Here’s a quick tutorial to include high-resolution retina ready images on your Unbounce Landing Pages / Convertables.


How to Install in Unbounce

Click Here for Instructions

🚨
This is not an official Unbounce feature. This functionality is based entirely on third party code, and has only been tested in limited applications. Since this isn’t a supported Unbounce feature, our support team will be unable to assist if things go awry. So if you are not comfortable with HTML, Javascript and CSS, please consider consulting an experienced developer.


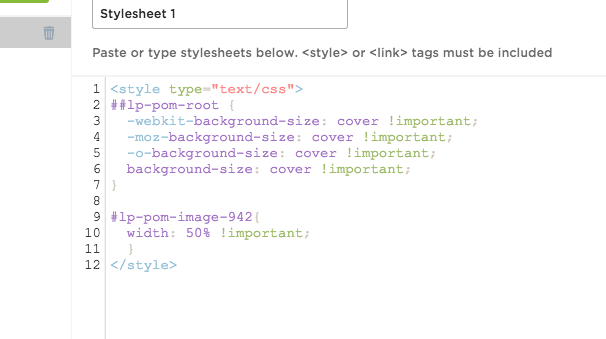
Method 1: Heavily compressed HiDPI Image

This method takes advantage of an issue in Unbounce where background images aren’t resized.

Step 1: Prepare your image
Start with the original (or largest) version of your image. Open your image in an image editor, such as Photoshop or Gimp (free). Resize it down to 2x the desired size (For example, if you want it 200x300px then resize it to 400x600px).

Save it as a jpeg with low compression quality 20 (or even 0). It might looks poor at the 2x size, but when you shrink it to the 1x dimensions, it will look great. (Check out the multiple sources for this technique).

Step 2: Add the image to your page
Add a new Box element (not an image element). The Image element will resize your image when you publish, ignoring all the work you put into step 1.

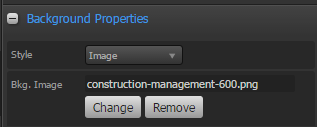
In the new Box element properties, set the background to the image you resized to 2x. Resize the box to the desired 1x dimensions (200x300px in the example).

Step 3: Publish your page
That’s it! When you publish, Unbounce will serve the original image you made in step 1. This image will have 2x as many pixels, but, because it is highly compressed, it’s not much bigger than the 1x and will look sharp on both regular and high-density displays.


Method 2: SVGs for Logos and Icons
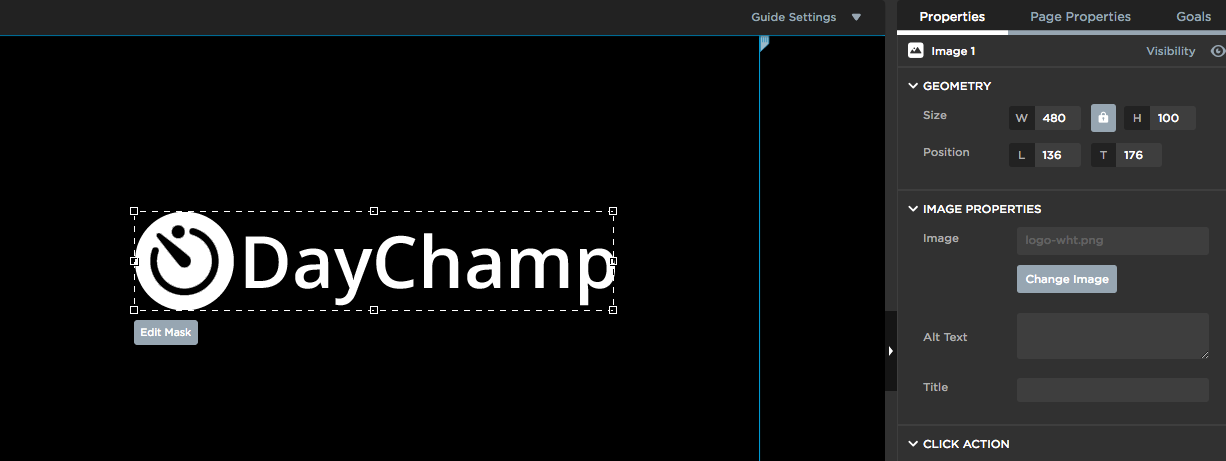
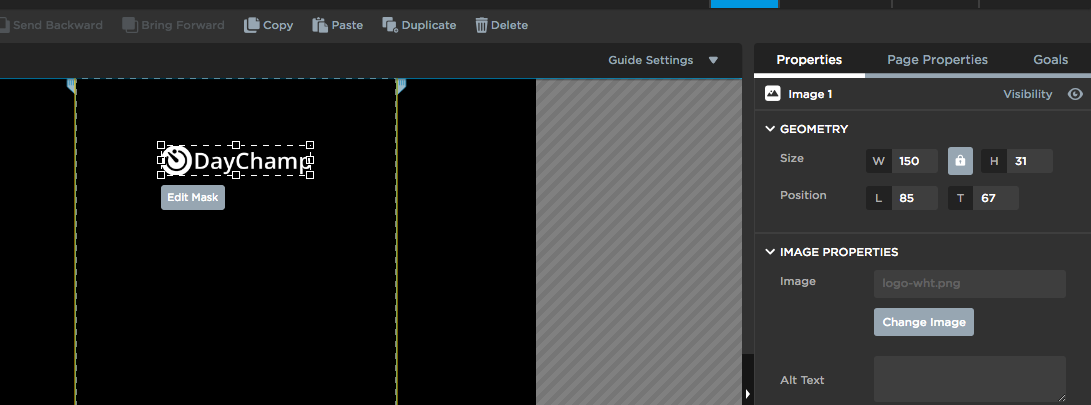
If you are having this fuzzy image problem with logos and icons, you can try using SVGs. Look at how blurry our logo used to be.

Step 1: Save your image as an SVG
(There are lots of guides online for this.)

Step 2: Add the SVG to your Page
Unfortunately, Unbounce has no support for SVG (despite it being a popular web standard). So we have to use the HTML element to make it work.

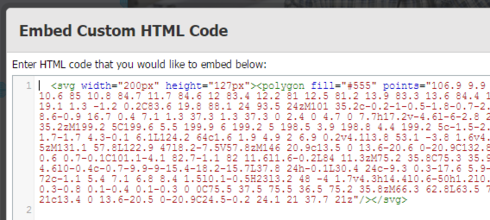
Open the SVG file in a code/text editor (Notepad in Windows or Text Edit in OSX will work). It will look kind of like HTML. Copy it. 

Back in Unbounce, add a new HTML element to your page. Paste the SVG code.

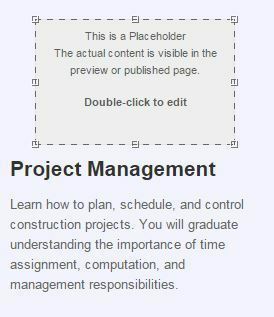
Since Unbounce doesn’t render HTML in the editor, you can’t see it in the editor (left image below). But you can see it in the Preview mode and it will render when Published (right image below).


NOTE: SVG isn’t supported by Internet Explorer 8 and below. If you need support for this browser, you can use one of the many fallback techniques.

I personally use IEs conditional comments to hide the unsupported SVG in IE8 and less and to show a PNG encoded as data uri. This makes it all self contained on a single page, but does increase the size of the page a bit.


Can’t see the instructions? Log-in or Join the Community to get access immediately. 🚀


Want to take your Unbounce landing pages + Convertables™ to the next level?
:spinbounce: Check out the Ultimate List of Unbounce Tips, Scripts & Hacks


33 replies

Thanks, @sahibjot_singh


BBBootstrap

Userlevel 2
Badge

Hi,
I have been trying to get sharp icons on my unbounce pages but never got successful with my edited icons.

But what worked for me, if i design or update the icons in Illustrator and export them in PNG. Uploaded quality on unbounce pages in reaaly sharp than the ones designed in Photoshop.

It happened for all my icons and this solution worked for me. Format remains as PNG but not sure what difference illustrator makes.

If this solutions works for anybody, that would be great.

Userlevel 7
Badge +1

Thanks, @Phillip!!

Hi Jess, is there an update on this?

Userlevel 7
Badge +1

Keep an eye on the forum here tomorrow @ayedlin! 🙊

Thanks for the workaround, Philip!

Is there any update from the Unbounce team regarding support for this? The workaround takes a lot of time.

@digibomb I am trying to use your CSS width 50% advice to get my retina images working but it doesn’t seem to
work… Not sure if I am doing something wrong with the CSS stylesheet:

I have also been trying the option where you drag a box onto the stage and set the BG image as your image_X2.png retina image, which seems to work for some images and not work for others.

Please help with a solution or work around as I need a fix ASAP!

Appreciate all of your help!

Well, since you asked so nicely @Domen_Kert… 🙂

I’ve shared this feedback with our team. Keep it coming!

Guys and gals at Unbounce, please get this done already. We would all love to see our logos sharp, and icons too. Now they look like smudges. I know you have a loooon pipeline (like everyone), but just bump it up, maybe. 😉

Thank you.

Userlevel 7
Badge +1

Awesome feedback @erikaalonso! Thank you!! 😁

You can add a link to an SVG by editing the code a bit. Here’s an example:

<svg width="140" height="30" xmlns="http://www.w3.org/2000/svg" 
    xmlns:xlink="http://www.w3.org/1999/xlink">

  <a xlink:href="https://developer.mozilla.org/en-US/docs/SVG"
      target="_blank">
    <rect height="30" width="120" y="0" x="0" rx="15"/>
    <text fill="white" text-anchor="middle" 
          y="21" x="60">SVG on MDN</text>
  </a>
</svg>

Just wrap the elements you want to add a link to with <a xlink:href="#" target="_blank"></a>.

Userlevel 6
Badge +1

@tkfxin it resizes it? You should be able to use an !important and keep the width whatever you need. You could also just scale it it down in the page builder too, either in the properties panel or with the handle bars when image is sleeted.

Here’s an example of how to do it with PNG, not really relative to this thread but hopefully this helps you …

Desktop image size

Mobile image size - same image scaled down

See it in action here.

@digibomb I’ve tried that and Unbounce actually resizes the original photo and not just the CSS width / height

Userlevel 6
Badge +1

The easiest way I have found is just to create a 2x bigger PNG file. Insert that on to your unbounce page. In the CSS panel just change the width, decrease by half roughly, the size you NEED it to look. That way you have the extra pixels for retina.

Works every time for me.

Sorry! I meant adding a button, not an image. My mistake! 

Thanks Paul. I’ll try that method on my landing pages.

@michele, I found a trick to put a link on the images. You have to add an image on top, and make it clear, and add a hyperlink to the image. Stupid work around of course being that it is 2016, but what can ya do :/ 

Also can’t link the images so only useful for static images.

Userlevel 7
Badge +1

Hey Daniel!

Unfortunately, JPEG’s don’t offer the ability to change transparency levels the same way that PNG’s and GIF’s do. So, in this particular situation you’re at a bit of an impasse. All I could really suggest is that if your image is placed on a white background on your landing page, save the JPEG with a white background. It isn’t the most ideal solution but it may still give you the results you need. 

I hope this helps! 🙂

How do I maintain image background transparency with this method? Once i save as JPEG then it loses the transparency. thanks

It works. What sucks though is that now you have to do that for every image. The attached image is how I feel now knowing I have to do this for all 20 images and icons on my landing page  alt

Agree! This is nuts it still is not supported. 

Thanks, this has solved my image resolution issue with retina/mobile screens. The only problem is that I now lose all the ALT tags on the images now that they’re in boxes.

Any update on retina support?

Reply