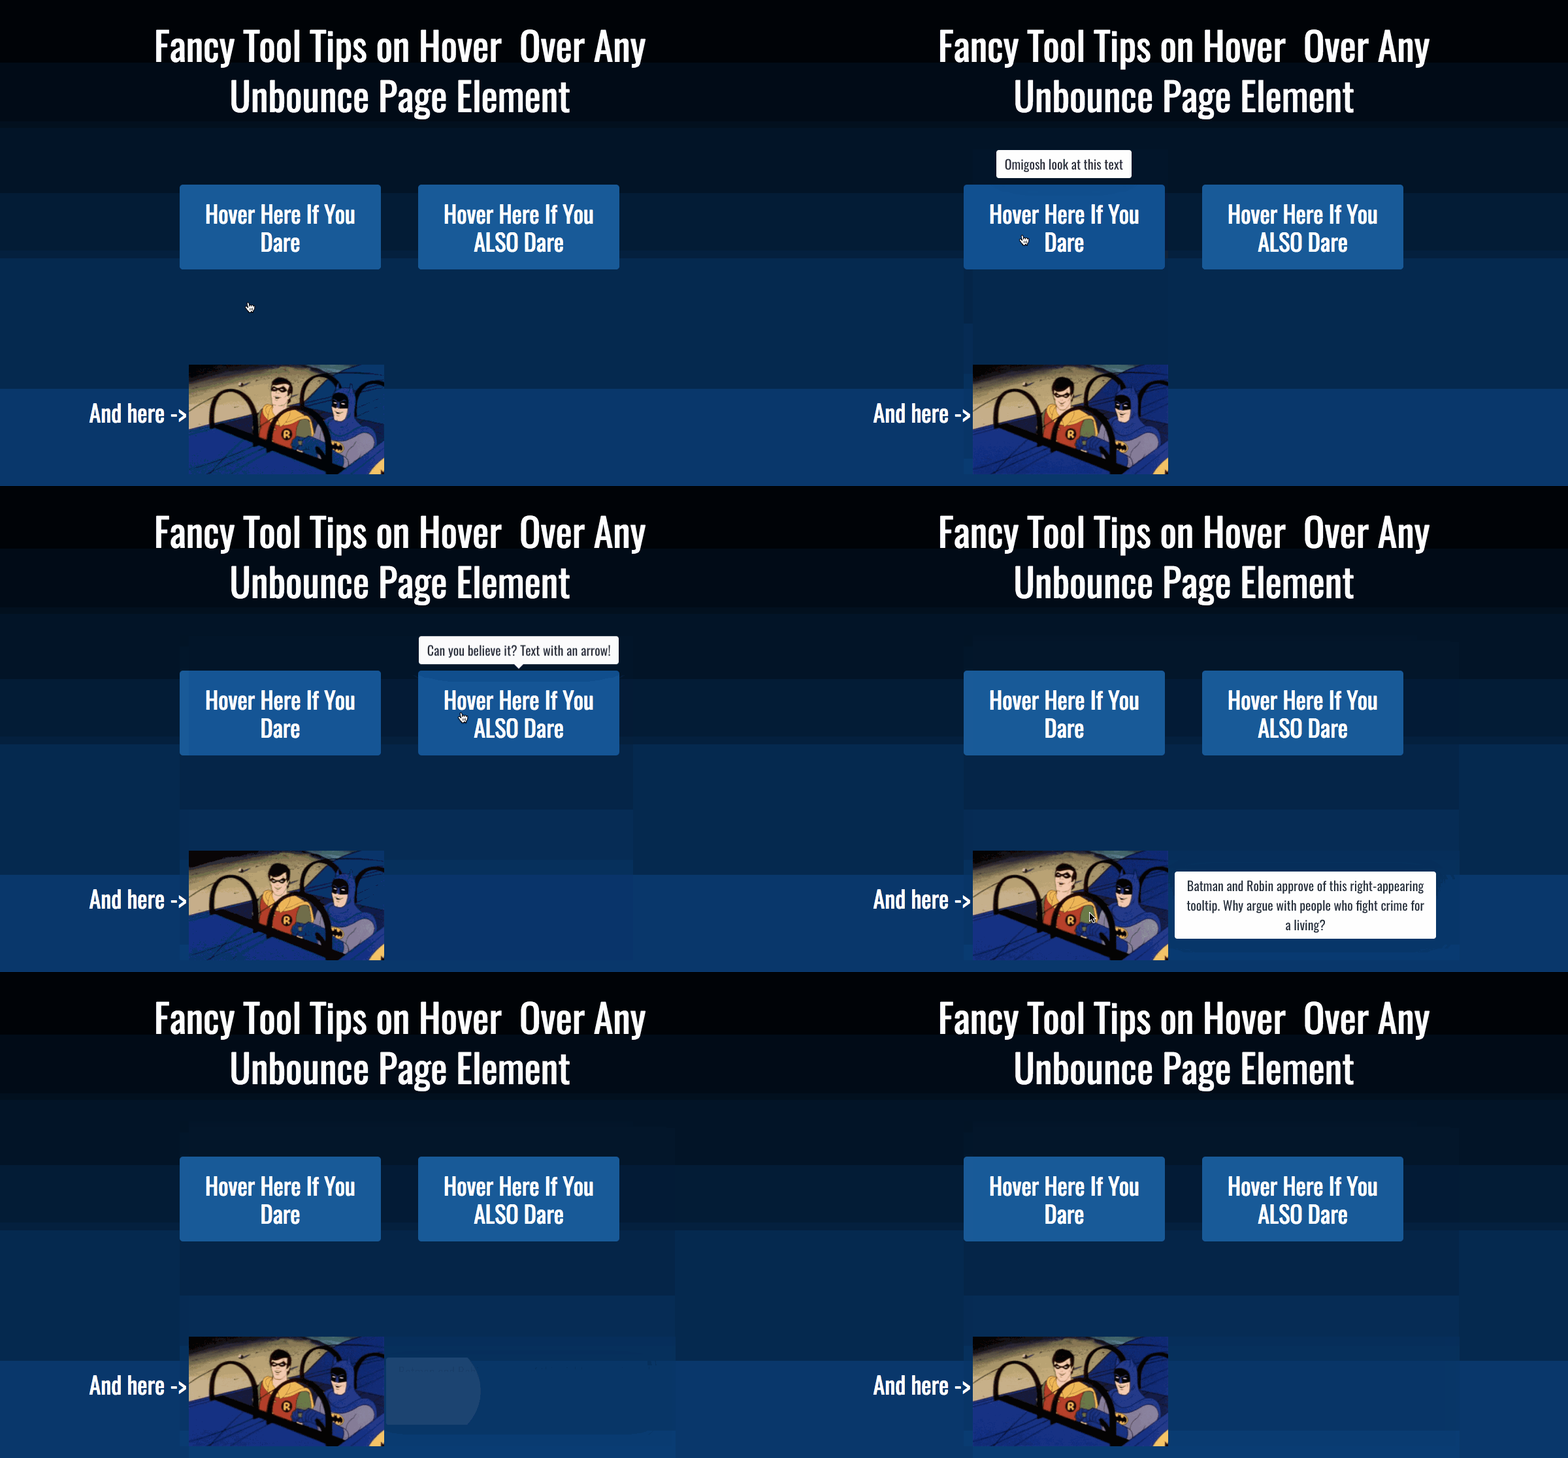
Do you ever wish you knew more? Do you desire more information?
If yes, you might need super stylish, slick, and informative Javascript tooltips.
Using Tippy.js, hovering over any Unbounce page element just became an opportunity to tell your customers MORE.
You can see this in action (built in Unbounce) here:
http://unbouncepages.com/javascript-tooltips-on-hover/
How to Install in Unbounce
Click Here for Instructions
🚨
This is not an official Unbounce feature. This functionality is based entirely on third party code, and has only been tested in limited applications. Since this isn’t a supported Unbounce feature, our support team will be unable to assist if things go awry. So if you are not comfortable with HTML, Javascript and CSS, please consider consulting an experienced developer.
Step 1.
Copy the latest scripts from https://gist.github.com/paulbounce/b16fc65b8e1fe65a450eca98a92f7bdc.
unbounce_hover_tooltips_load should be placed in Javascripts with position set to Head.
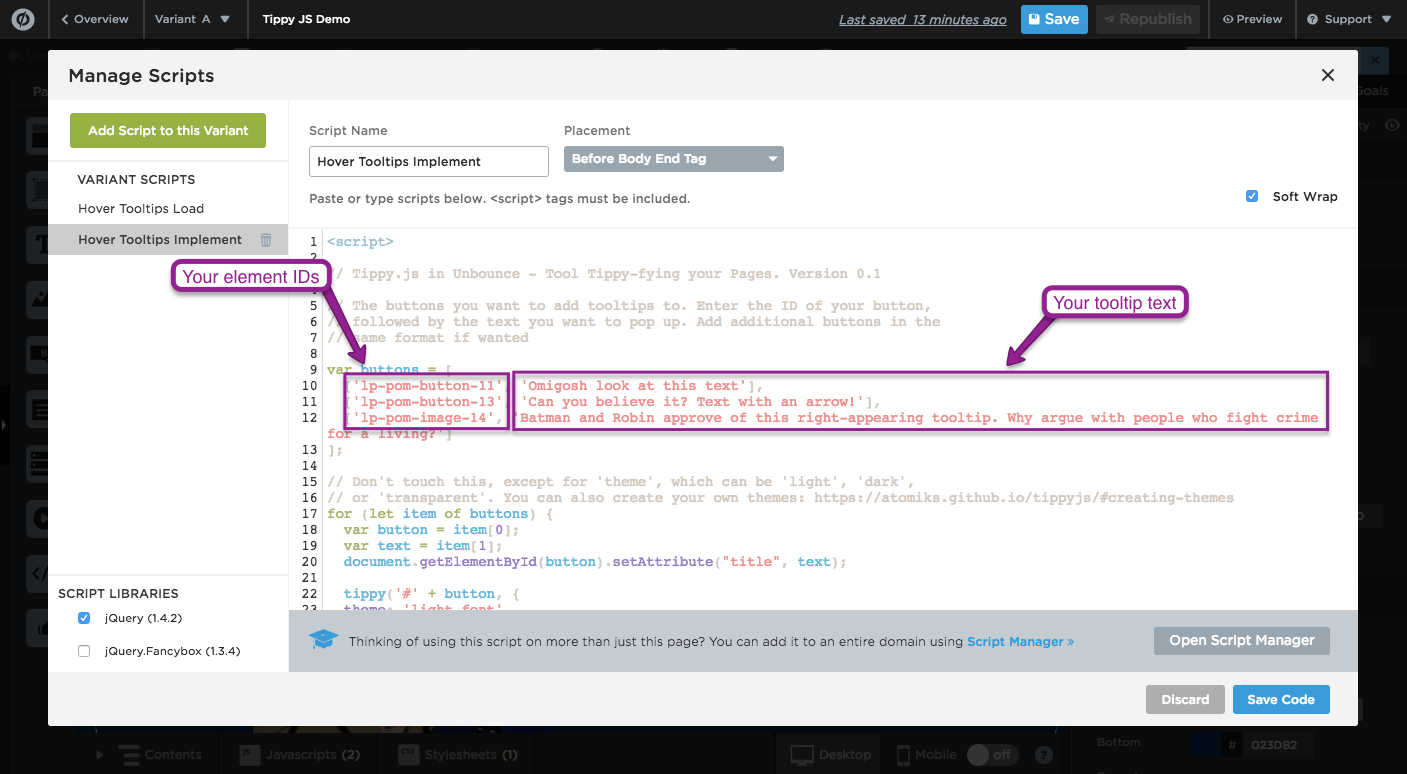
unbounce_hover_tooltips_implement should be placed in a separate Javascript with position set to Before Body End.
Step 2.
Update the buttons variable in the script to define which content should have a hover effect, and what the tooltip should say.
Step 3.
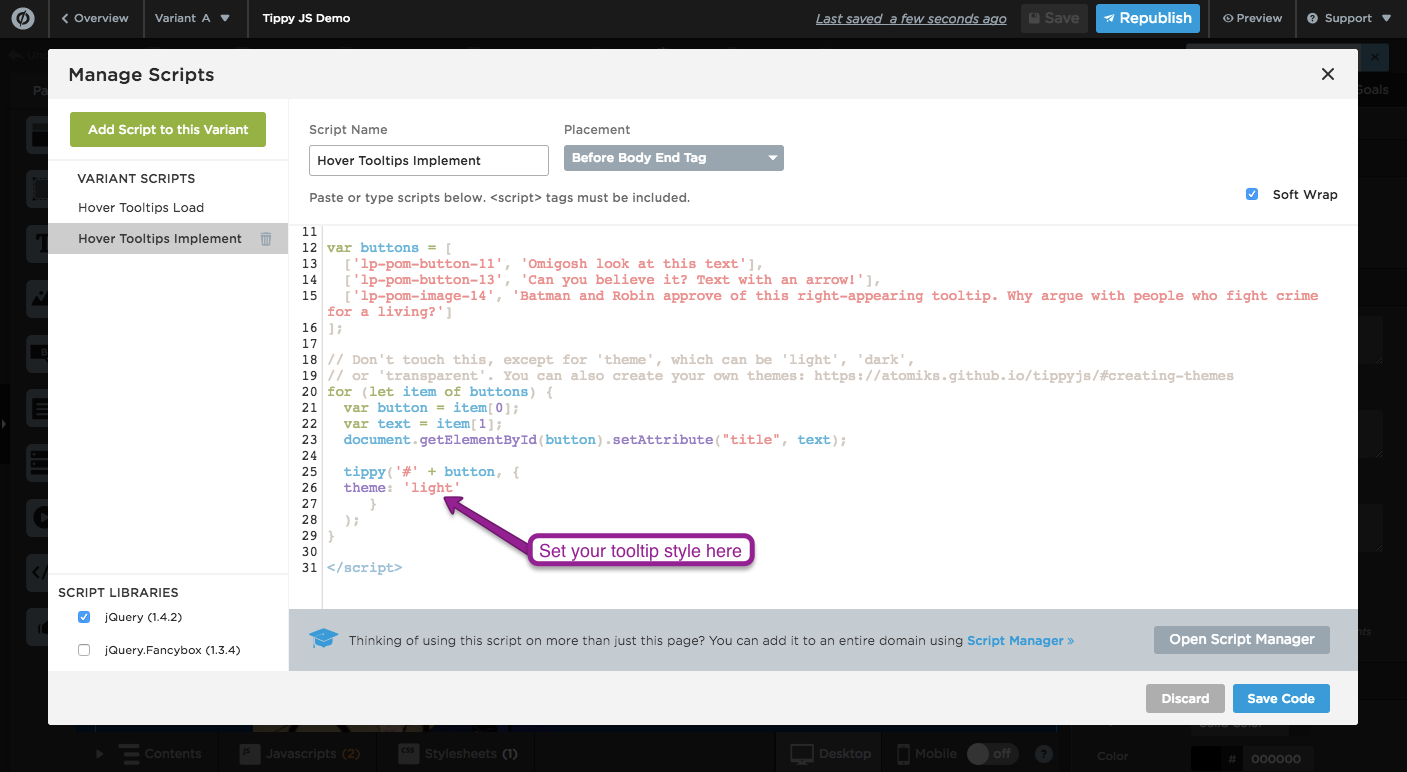
Set the style of your Tooltips as one of Dark, Light, or Transparent.
Step 4 (optional).
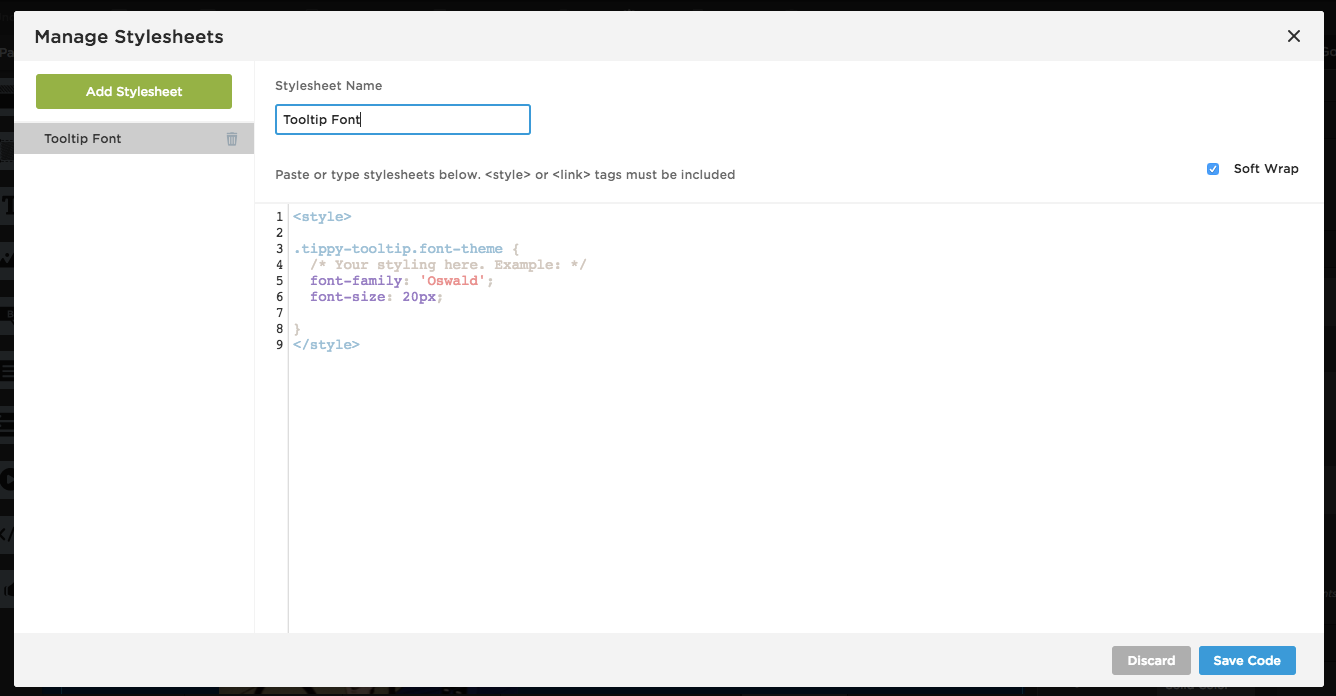
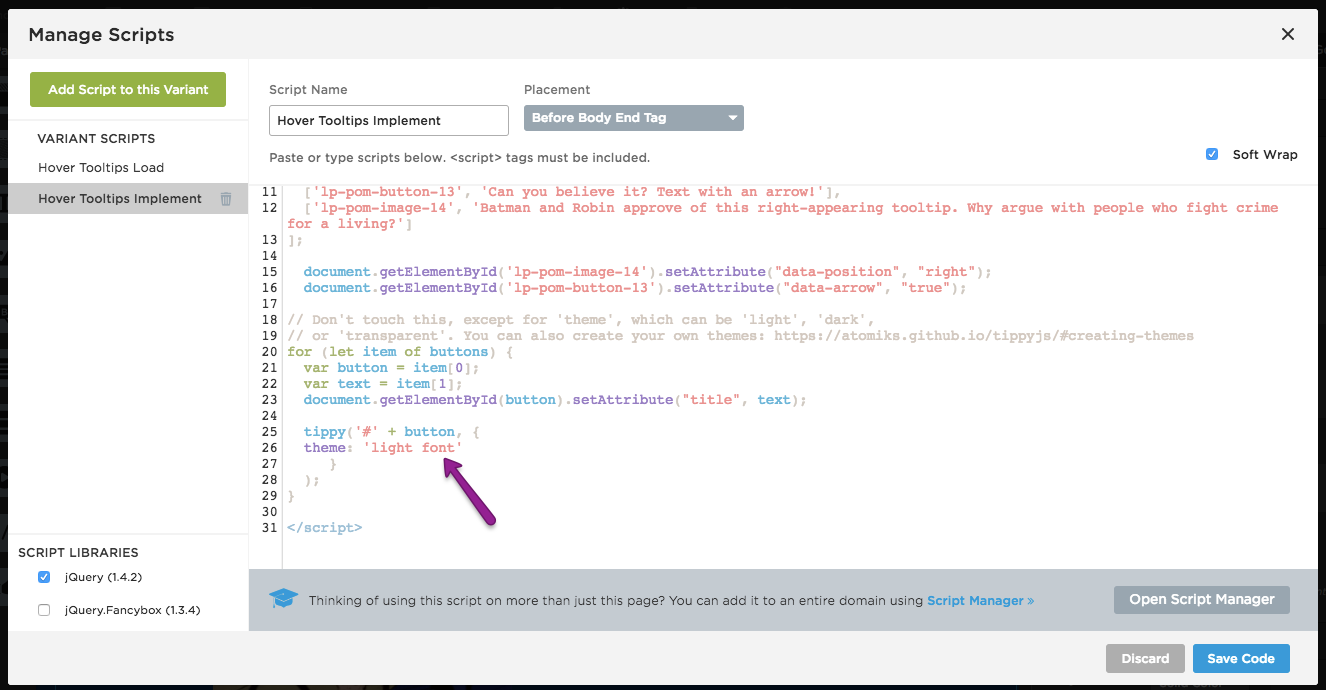
Create and implement a theme to apply styling to all tooltips, or use the data convention to add arrows and change behaviour on individual elements.
For example, the following would add an arrow to button 13:
document.getElementById('lp-pom-button-13').setAttribute("data-arrow", "true");
And the following would change the font to Oswald and the size to 20:
Want to take your Unbounce landing pages + Convertables to the next level?
 Check out the Ultimate List of Unbounce Tips, Scripts & Hacks

