If you don’t currently have an ecomm store, Stripe is a good option for collecting payments as well as test the market for your products. Now you can build your own Stripe checkout right into your Unbounce landing pages to make it easier to turn more browsers into buyers.
See it in action! 💥 Here’s a landing page (built in Unbounce) using a built-in Stripe checkout.

Below we’ve broken down the instructions into two sections (with video) to make it as easy as possible.
🚨
This is not an official Unbounce feature. This functionality is based entirely on third party code, and has only been tested in limited applications. Since this isn’t a supported Unbounce feature, our support team will be unable to assist if things go awry. So if you are not comfortable with HTML, Javascript and CSS, please consider consulting an experienced developer.
Step 1. Enable checkout and create SKU in Stripe
- Go to “Settings”
- Go to “Checkout Settings”
- Make sure you toggle “Enabled” on the top right corner of your screen
- Enter the domain you want to use for your checkout (your landing page domain)
- Go to “Create your first product”
- Click “Add a test product”
- Select whether it’s a one-time purchase or recurring product
- Enter product name, currency, and upload image
- Click “Done”
- Click “Use with Checkout”
- Enter your “Success URL”; this is where you will send users after they purchase and were you can setup your purchase tracking (make sure this URL is also whitelisted on step 4)
- Enter your “Cancel URL”
- Copy the embed code and click Done

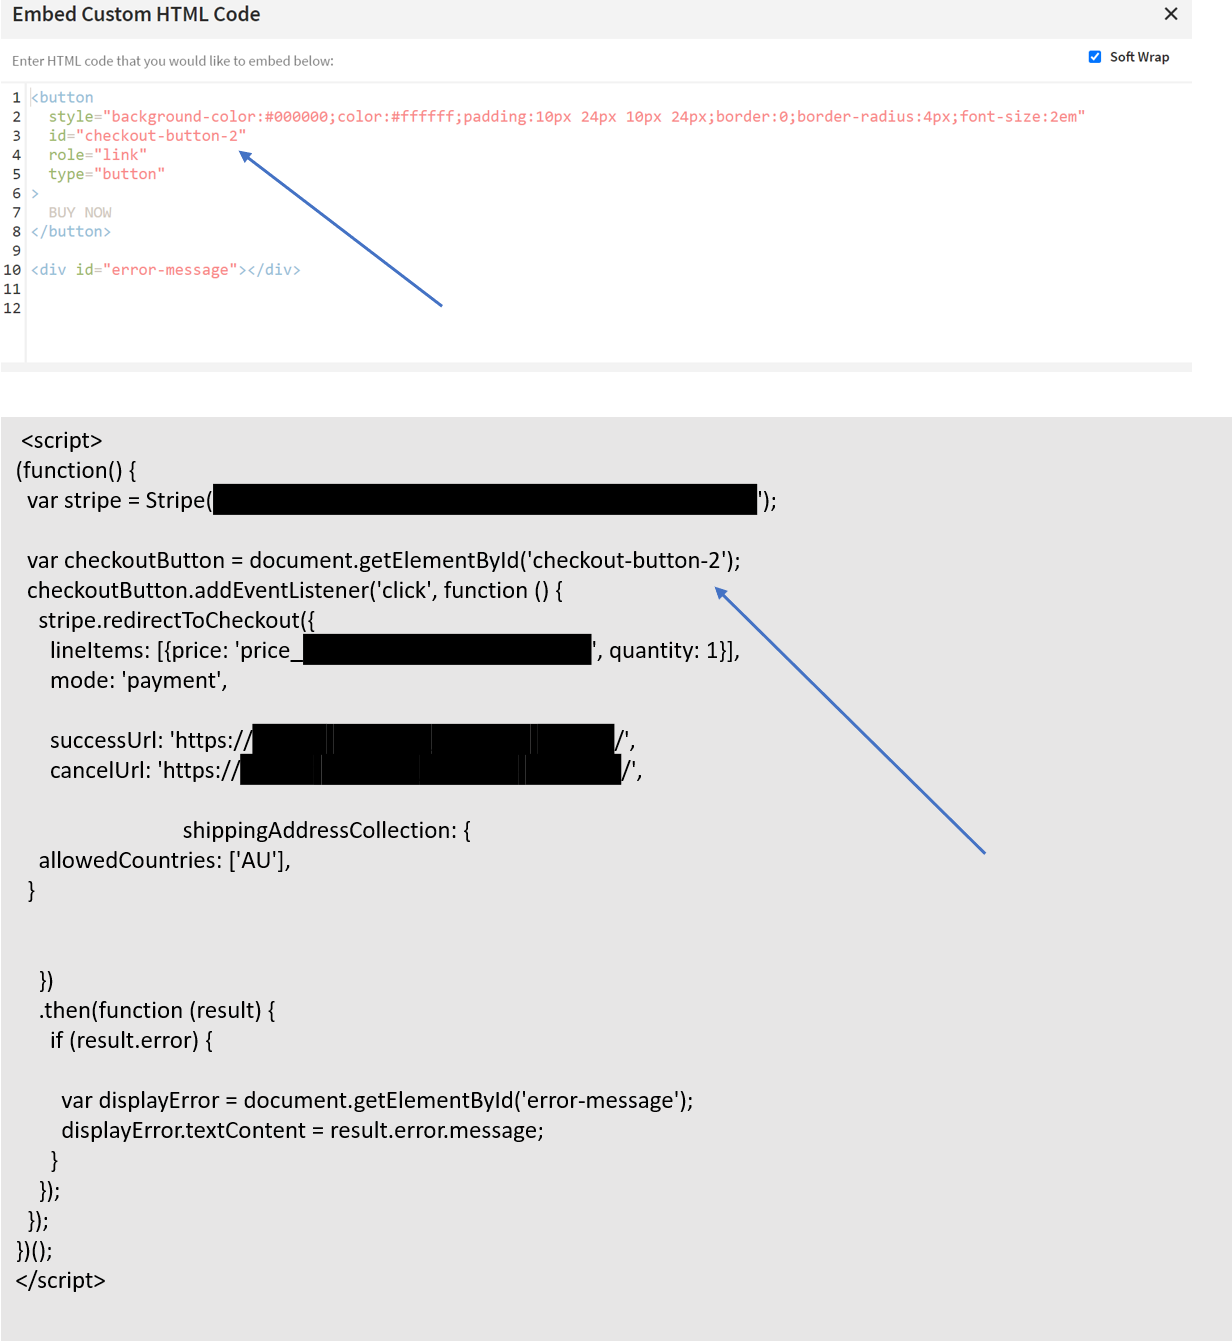
Step 2. Paste embed code in your Unbounce landing page (style as needed)
- Drag and drop Custom HTML widget
- Paste embed code and click Save
- Position your placeholder
- Click Save and then Preview to make sure your CTA Button is positioned where you want it
- Style CTA Button with CSS

That’s it! You’re done!
Let us know if you have any questions about these instructions in the comments section below 👇
Want to take your Unbounce landing pages + popups to the next level?
 Check out the Ultimate List of Unbounce Tips, Scripts & Hacks