
Hi there, wanted to share a little trick I discovered regarding pop-ups, form confirmation dialogs, and the Pardot tracking cookie.
I’m using Unbounce’s pop-ups on my website, and the pop-up contains a lead form. I wanted to also utilize a Pardot form handler with the pop-up form, so I could take advantage of the Pardot cookie and set it on their browser when they fill out the pop-up form.
The problem: I didn’t want to redirect my visitors away from the pop-up to a different confirmation page. I wanted to use the Unbounce form confirmation dialog, but ALSO post the form data to a URL. I’m also not a coder, so I needed something simple.
Here’s the workaround I found:
- Create the pop-up in Unbounce, including the form. Design a form confirmation dialog that you’d like to use. Make the pop-up live on any webpage. For the next step, we’ll need to activate the popup as if you’re a user.
- Go to the webpage where the popup is active; trigger the pop-up to appear. Submit the form. When the confirmation dialog appears, right-click it and choose INSPECT ELEMENT. We’re going to retrieve the URL of the form confirmation dialog.
- This part varies depending on browser; I’ll share Firefox instructions.
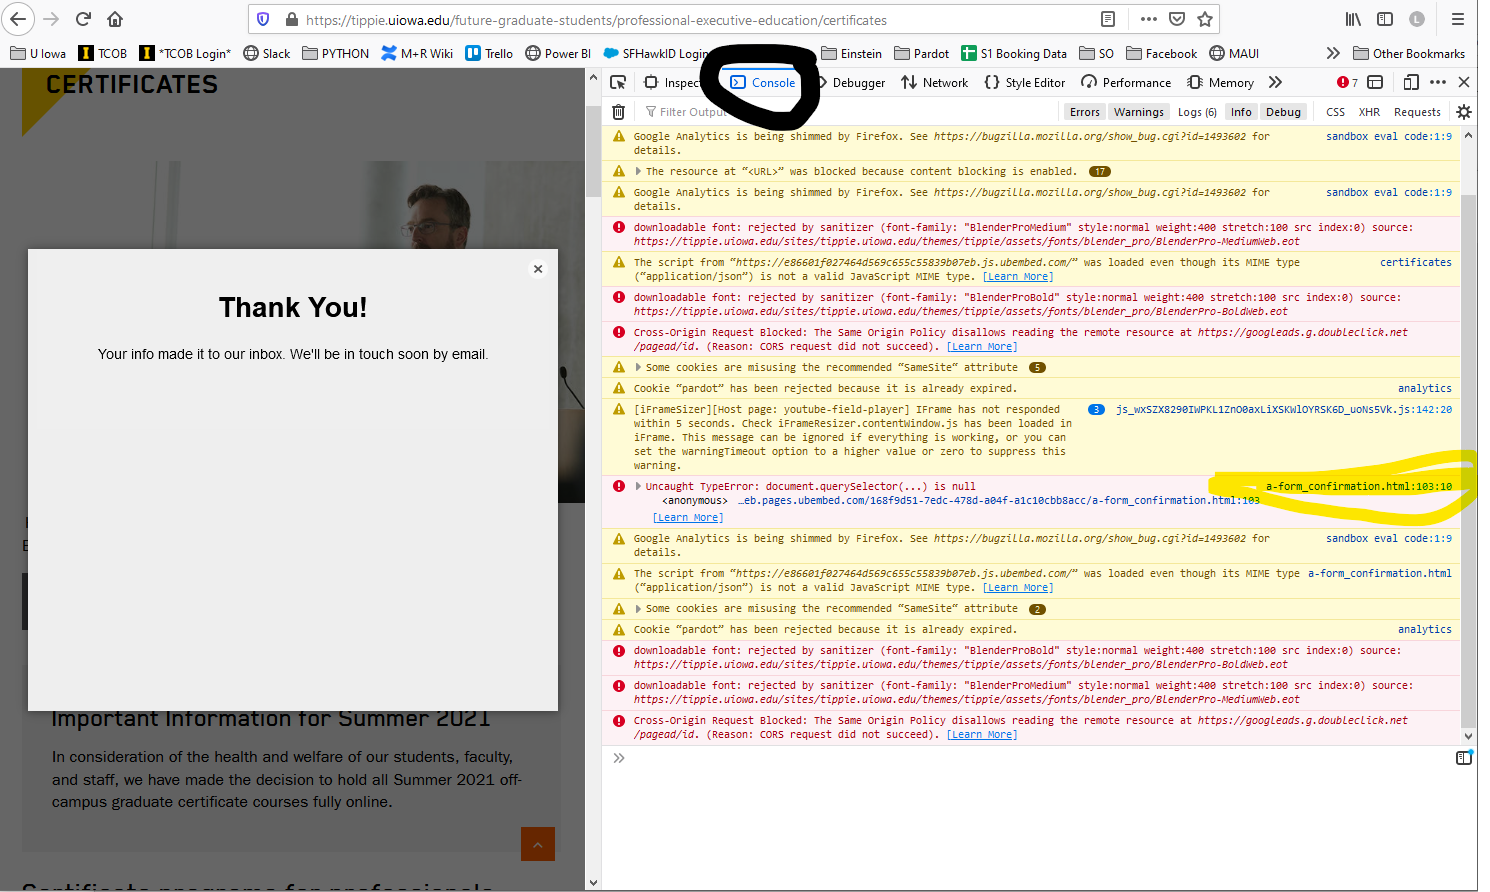
FIREFOX: in the Inspector window, click CONSOLE tab. What you see will vary from what I see, but my console shows errors and logs. Look for a row that contains a link at the far right that looks something like “a-form_confirmation.html”. It might be a different letter depending on your variant. Right-click the “a-form_confirmation.html” and choose COPY LINK LOCATION.
You can check that you did this correctly by opening another tab and pasting in the URL you just copied. You should see the form confirmation dialog. (You can unpublish your pop-up now; we won’t need it again until testing.) - Create form handler in Pardot in the usual way (make sure the field names match up). For Success Location, paste in the URL you copied from the inspector in the last step.
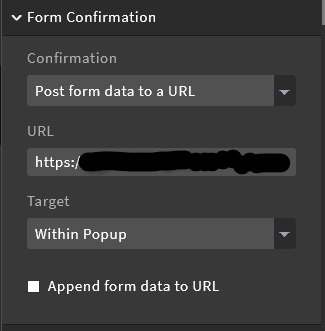
- Save your form handler, then copy the Endpoint URL from your Pardot form handler. In Unbounce, go to the Form Confirmation settings for your form and from the first dropdown, select “Post form data to a URL.”
- Paste the endpoint URL into the “URL” field (watch for random spaces at the beginning and the end!)
- For Target, select ‘Within Popup.’
- Save and publish, and test.
A couple of things to note:
The form confirmation dialog window will appear the same size as your pop-up, rather than the size it was designed. Probably best to make the form confirmation dialog design the exact same dimensions as the pop-up.
The Pardot cookie, at least for me, is getting set consistently using this process. It isn’t, however, connecting their anonymous browsing history with their post-conversion browsing history. I’m trying to solve that problem currently.


